The test image used here is shown in Figure 1. It was obtained with a Canon
1D Mark II 8-megapixel digital camera, at ISO 100, raw plus jpeg modes.
The raw image was processed first.
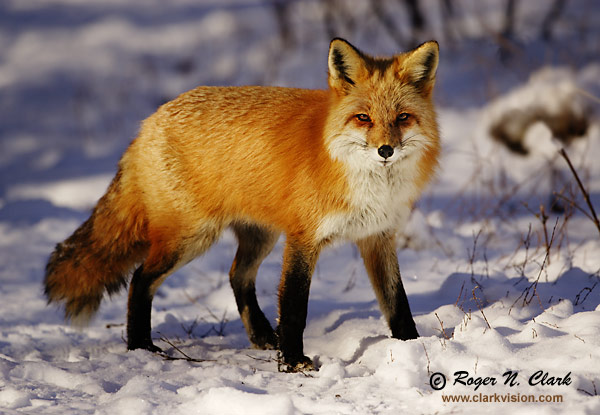
Figure 1. Red Fox, final image after image levels and contrast adjustments,
and image restoration.
Figure 1 shows the whole image with a minor crop off the left side from the original
image.
For detailed comparisons, we'll look at the image data at full resolution
around the left eye. This is shown in Figure 2. In order to maximize
image detail, I experimented with 2x and 4x enlargements using Photoshop's
cubic spline image size tool. Since 4x image restoration tests gave
essentially the same final detail as 2x enlargements, I present the 2x
results here. The cropped test section of the 2x cubic spline enlargement
is shown in Figure 3. The original image is 3504 x 2336 pixels. At 300
pixels per inch (ppi), that makes a 11.68 x 7.79 inch print. The 2x
enlarged full image has 7008 x 4672 pixels, and at 16-bits/channel is a
192 MByte file, making a 23.36 x 15.57 inch print. But that print would
not be real sharp.
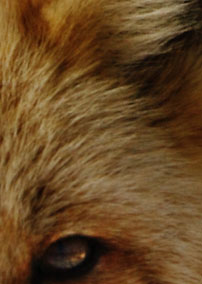
Figure 2. Red Fox, full resolution image after image levels and contrast adjustments.
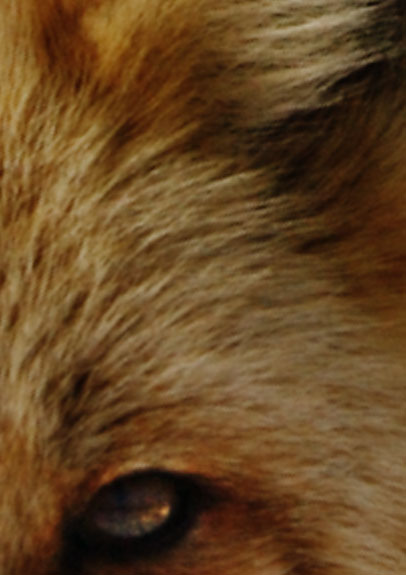
Figure 3. Red Fox, 2x cubic spline enlarged image. This is the base image
for image restoration tests.
As a first step, the image was sharpened with Photoshop's unsharp mask
tool. Two unsharp mask methods are tried: small radius large effect
in Figure 4, and larger radius, small effect two times in Figure 5.
The two step method with larger radius produces a better result in my
opinion. But it would be nice to be sharper.
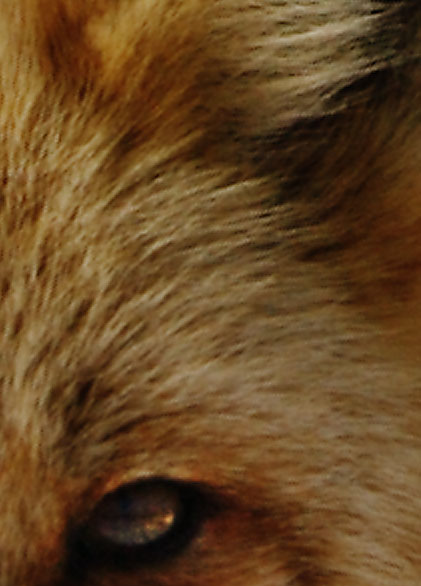
Figure 4. Red Fox, image from Figure 3 after photoshop unsharp mask, radius = 0.6,
300%, threshold = 3. There is little change from the image in Figure 3.
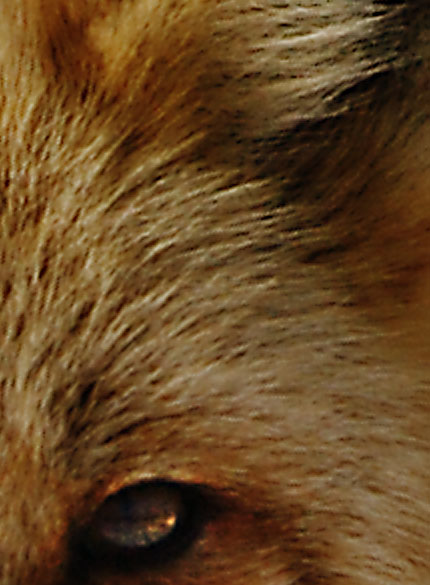
Figure 5. Red Fox, image from Figure 3 after photoshop unsharp mask, radius = 4.0,
75%, threshold = 3, then another unsharp mask with radius = 2.0, 66%, threshold = 3.
This is a about the best I can do with the unsharp mask tool
Adaptive Richardson-Lucey image restoration was tried using ImagesPlus. Various
iterations, point spread sizes, and noise thresholds were tried. The
point spread of 7x7, with 20 iterations in Figure 6 produced the best
result for this image, considering the entire image. This method
also produced few artifacts, fewer than the unsharp mask method,
and again considering the whole image.
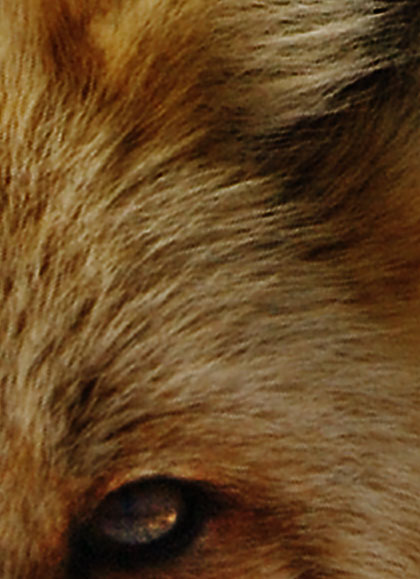
Figure 6. Red Fox, image from Figure 3 after Adaptive Richardson-Lucey
image restoration, point spread function = 7x7, noise threshold = 2.0
standard deviations, 20 iterations. The image restoration took about 1.5 hours
on the 7008 x 4672 pixel image on a circa 2005 1.8 GHz Pentium 4 computer. It took 32 seconds
to do the same thing to the smaller Figure 3 image.
On a circa 2012 3-Ghz I7 class machine, it only takes a couple of minutes.
The disadvantage of the Adaptive Richardson-Lucey restoration is compute
time, and increased noise (but unsharp mask also enhances noise).
The signal-to-noise in a smooth area above the fox's head is 64.9 in
the original image, 64.8 in the Unsharp Mask image, and 62.0 in the
Adaptive Richardson-Lucey image. So, considering the improvement,
shown side by side in Figure 7, the small loss in signal-to-noise is
worth the improvement in my opinion. The ImagesPlus program can have
multiple images open at once and the restoration done on all open images.
So one can set up a long run and go to work or bed, or out photographing
while the computer works.
Finally, one can use more than one method. Figure 8 shows the result
from the image restoration in Figure 6 with unsharp masking applied.
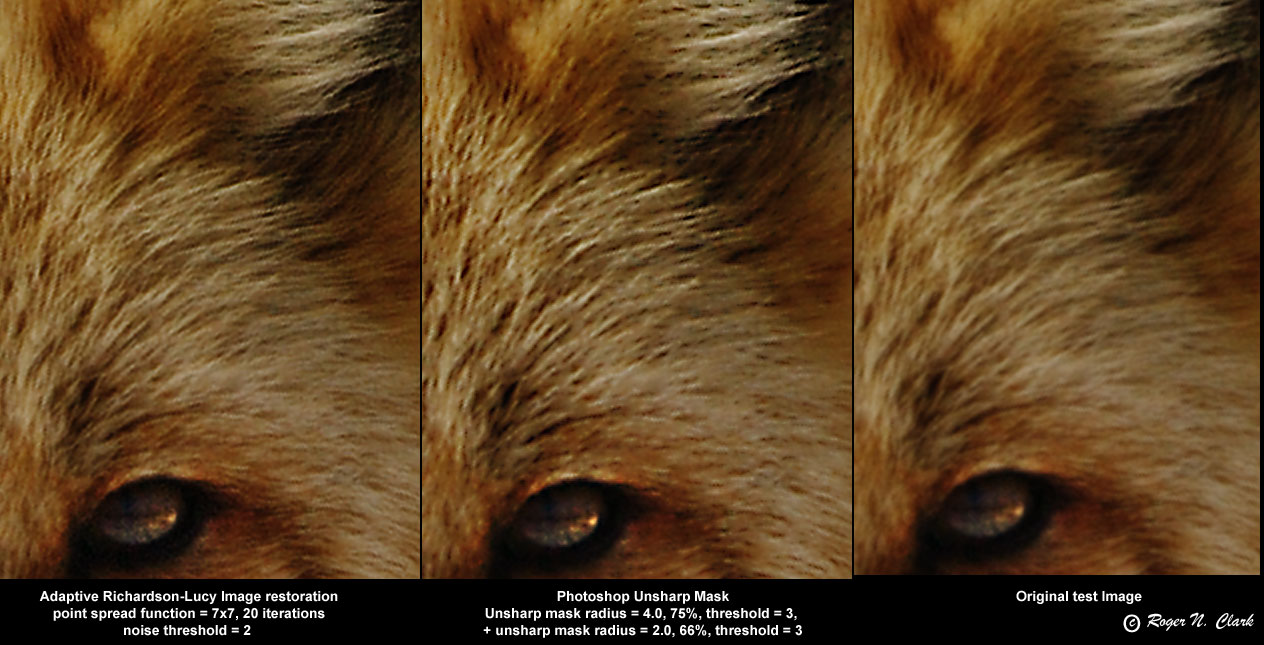
Figure 7. Image data from Figures 3, 5, and 6 side by side for comparison.
Note how the hairs in the Richardson-Lucey deconvolved image are much narrower
than those from unsharp mask. Unsharp mask has increased edge contrast but
has not improved resolution.
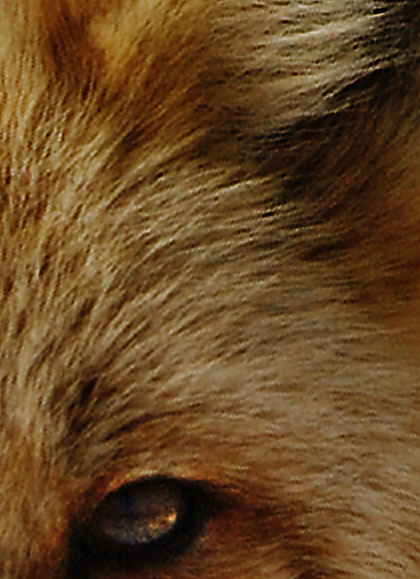
Figure 8. Red Fox, Image from Figure 6 with Unsharp Mask applied with radius = 1.2,
level = 100%, threshold = 2. There is no reason one can't apply image restoration
and unsharp mask to improve the image.
Conclusions
Image restoration (also called image deconvolution) methods, like Adaptive
Richardson-Lucey provide a significant improvement in image sharpness
over traditional unsharp mask methods. My impression of Photoshop,
working in 16-bit mode, results in posterization of the output results
from the unsharp mask, while ImagesPlus Adaptive Richardson-Lucey
algorithm produces a smoother looking image with more tonal gradations,
as well as sharper appearance of edges and detail. I believe I can
get 2x larger prints with similar apparent sharpness using Adaptive
Richardson-Lucey methods. This makes an 8-megapixel camera more like
a 32 megapixel camera.
If you would like to try and improve the image better than I have done,
here is a link to the original crop 16-bit/channel tif file, 355 KBytes:
fox.c01.06.2004.JZ3F3731.frmraw-crop1a.b.tif
If you make an improvement, I would like the see your results, and how
you achieved it.
If you find the information on this site useful,
please support Clarkvision and make a donation (link below).
This is Part 1 of illustrating image sharpening methods.
Next is Part 2:
Image Restoration and Down Sampling
Using Adaptive Richardson-Lucy Image Deconvolution
Part 2
here: http://clarkvision.com/articles/image-restoration2/
The rest of the series:
Image Sharpening Introduction:
http://clarkvision.com/articles/image-sharpening-intro/
Unsharp Mask
Part 1 is
here: http://clarkvision.com/articles/image-restoration1/
Part 2 is
here: http://clarkvision.com/articles/image-restoration2/
Part 3 is
here: http://clarkvision.com/articles/image-restoration3/.
Related References:
Film Versus Digital Executive
Summary.
Image Restoration Using the Damped Richardson-Lucy Method
by Richard L. White, Space Telescope Science Institute
http://www.stsci.edu/stsci/meetings/irw/proceedings/whiter_damped.dir/whiter_damped.html
Image Restoration http://www.astrosurf.com/re/resto.html
MLUnsold Digital Imaging: Images Plus:
http://www.mlunsold.com
Lucy, L.B., "An iterative technique for the rectification of observed
distributions", Astronomical J., 79, 745, (1974).
Richardson, W.H., "Bayesian-Based Iterative Method of Image Restoration",
J. Optical Society America, 62, 55, (1972).
Notes:
DN is "Data Number." That is the number in the file for each
pixel. I'm quoting the luminance level (although red, green
and blue are almost the same in the cases I cited).
16-bit signed integer: -32768 to +32767
16-bit unsigned integer: 0 to 65535
Photoshop uses signed integers, but the 16-bit tiff is
unsigned integer (correctly read by ImagesPlus).
http://clarkvision.com/articles/image-restoration1
First Published January, 2005.
Last updated January 12, 2014


